XStore 9.4.5 introduces a tokenized integration method, designed to facilitate the transition from Instagram Graph API to Instagram Business Display. This innovative approach utilizes tokens instead of relying on a dedicated app for integration. This change has been implemented in response to ongoing adjustments and reviews on META’s side. By employing tokens, the integration becomes less reliant on a specific app, thereby reducing the risk of unexpected issues or downtime resulting from changes or updates to the app. This ensures a more robust and dependable integration.
To guide you through this transition, we’ve outlined a straightforward process to create an Instagram access token in just several simple steps. These steps involve leveraging your Instagram account and the resources provided by Facebook Developers. You will be instructed on how to create an app on the Facebook Developer platform, configure Instagram Business Display, and generate your Instagram access token.
Initially, transitioning to a token-based connection may appear somewhat daunting, but there’s no need to be apprehensive. Once you become familiar with the process, you’ll discover that tokenized integration is a user-friendly and efficient solution.
Step 1: Login and add a New App on Facebook Developers #

After logging in, click the “My Apps” button as shown in the screenshot.

On the open page, click “Create App.”

Once you click this button, you’ll be asked to choose the purpose of your app. This determines the permissions your app will require. In this case, select the “Business” option as shown below. Click the next button.
Step 2: Configure Instagram Business Display #
You will be taken to the Instagram API setup page. From here press the “Add account” button in the “Generate access token” sections
Step 3: Generate Your Instagram Access Token #
After adding your account, we’ll proceed and generate a token for it
A pop-up will appear asking you to log in to your Instagram account and allow the App you’ve just created.
Step 4: Entering the token into the XStore admin panel. #
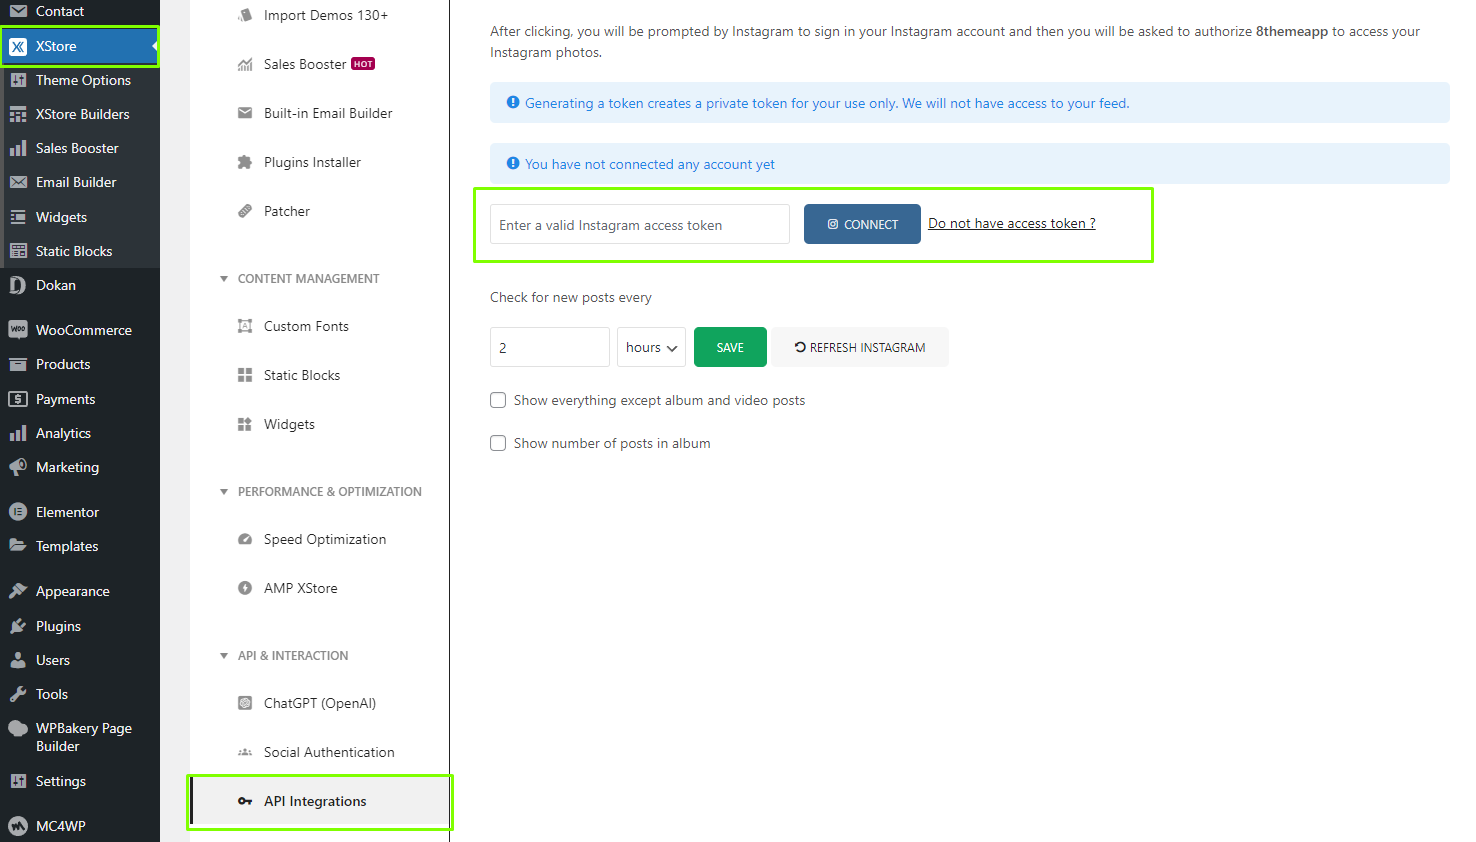
Log in to the WordPress admin panel and navigate to the XStore panel -> API Integrations -> Instagram Accounts. Paste the code you received earlier into the “Enter a valid Instagram access token” field and click the “Connect” button.

After this, you can select your Instagram user in the settings of elements and widgets on your website.


